Tuesday, February 24, 2009

The Van Gogh end table

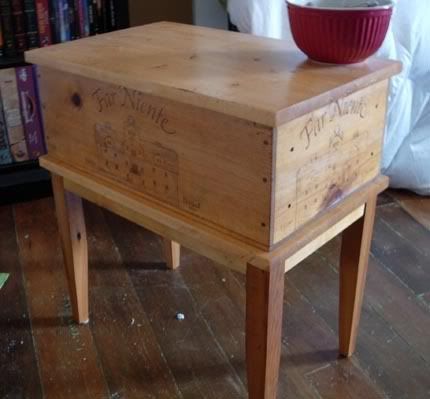
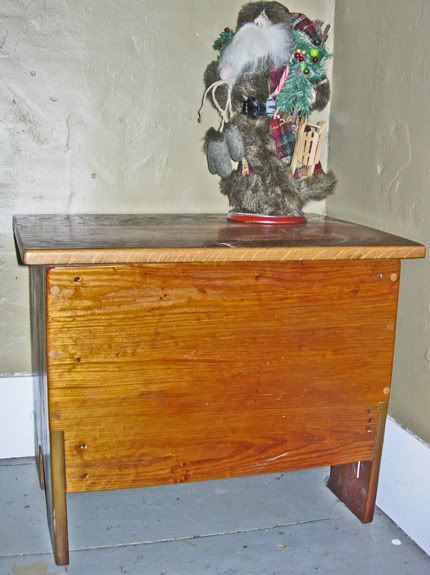
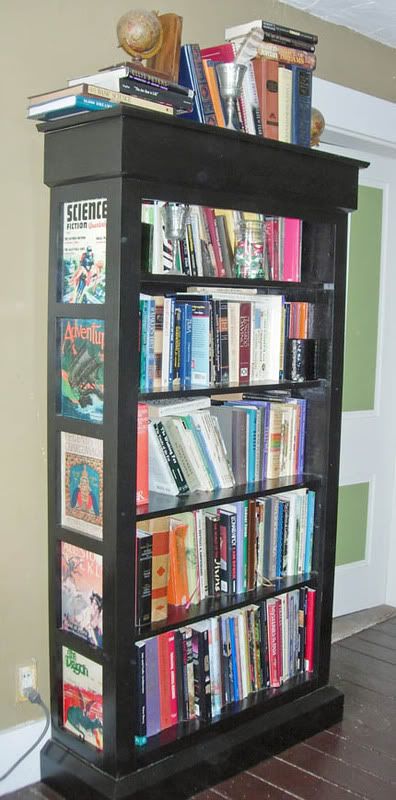
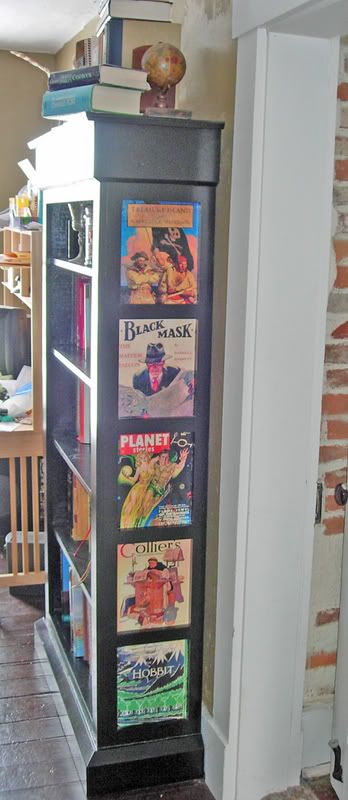
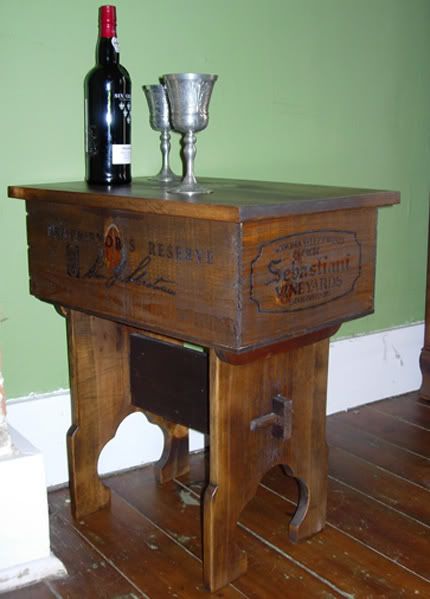
This is a little end table that was fun to build, or at least interesting, which is the same thing to me. I learned a few things that will be applied to future builds and I think I'd like to use this same general idea on a lot of other projects. A library table comes to mind. Maybe one with scenes from famous books inset in the apron wrapping around the underside.

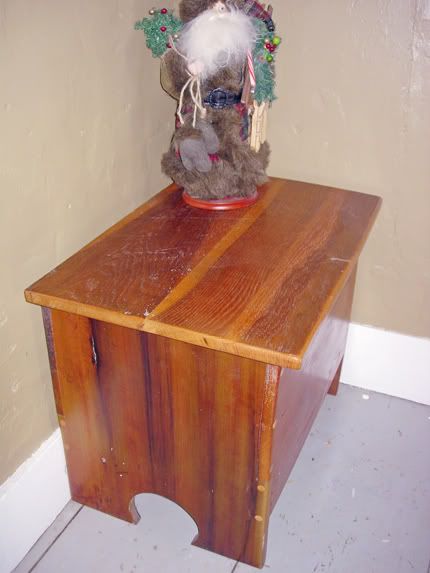
The top of this table is actually a sample raised panel that my mom picked up at a yard sale. It's beech, a tight grained wood that is often used as a substitute for cherry.
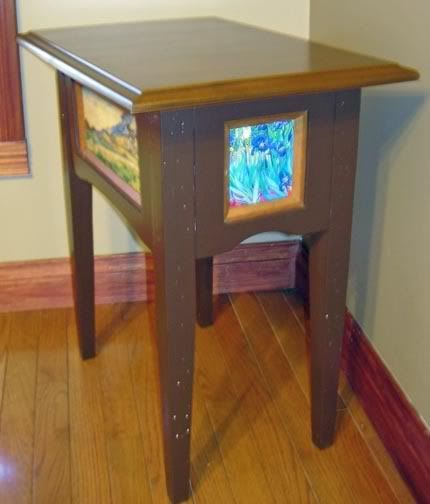
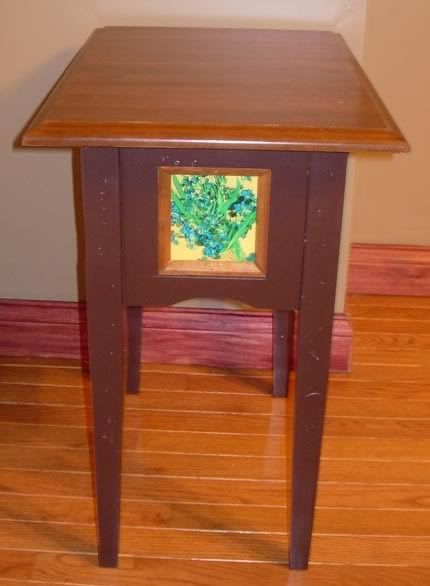
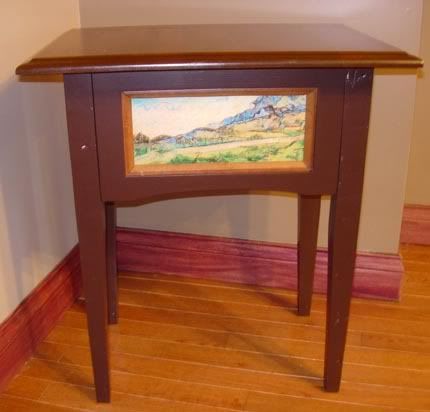
The picture frame aprons are pine, just stock 1x2 material. I picked it out for it's straight grain and clean look. The images themselves are all paintings by Van Gogh, clipped to size in photoshop, and printed on heat transfer sheets. The sheets are then ironed on to 1/4 inch plywood backs that are inset in the backs of the frame aprons like a picture would be. I ran a chamfered edge moulding around the inside of the frames and stained it to bring out a contrast with the paintings. I had to make the moulding since I didn't have anything on hand that would fit, that was tedious.

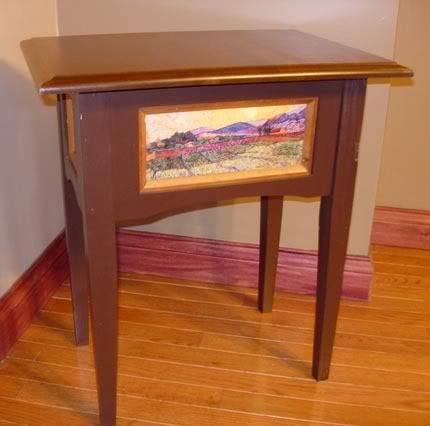
The legs are pencil posts with a sharper inner angle. They are again reclaimed fir 2x4s with many nail holes and chips. The top is stained, but I painted the legs and aprons with a dark brown called "expresso". It's a great color, but I won't use that company's paint again because it was a terrible pain to get spread on evenly. It took four coats before I was satisfied.
The legs bolt on and come off easily. This time I used wing nuts, so no wrench is needed.


I've come to really like Van Gogh. I didn't care for expressionism when I was younger. Everything is expressionist in the morning before you find your glasses, and I couldn't see what was all that great about that. I have nice scans of some of his lesser known works now, and I'd like to use them in something. I just don't know if my wife will like the skeleton smoking a cigarette, or the earless self portrait.


Saturday, February 21, 2009

Wine crate end table with legs.

This is the first wine crate end table that I built. I did this one with four tapered pencil post legs before I decided the renaissance trestle style worked better for the wine crates.
The legs are reclaimed fir, sawed down from old 2x4s with nail holes and oxidation stains left in, I like them better that way.
The stain is very light, Minwax Ipswitch pine. It hardly darkened the wood at all. I tend to like darker stains, but I thought I'd give this one a try. The table was meant for a room with a dark wood floor and brown walls and I figured a light colored piece of furniture would help brighten the room.

The legs on this table bolt on and are removable. The pieces of the apron are screwed and glued to the plate that the crate sits on. a corner brace connects with each part of the apron and a threaded bolt pulls the leg tightly into a triangle formed from the aprons and the brace.

I learned this design for attaching legs when I was working for an Amish furniture dealer. The Amish used this design on all the leg tables they made, from end tables to twenty seat dining tables and I think it's the strongest leg joint you can have. A little piece like the wine crate end only needs a single bolt in the corner, but bigger legs use two or three.

As the table ages, or due to temperature and humidity variations, the wood may shrink or expand, but this joint requires only a quarter turn on the nuts to keep it snugged up tight.

The top comes off to access the crate for storage, and this one is currently full of photo albums, you know, physical pictures, from before we let them pile up on the hard drive unseen.

Friday, February 13, 2009

My dog wants a bite of your sandwich.

Give the Pupster some sandwich, and a chip, he likes chips.

Monday, February 9, 2009

Sofa Table.

A sofa table or hall table is what you call any tall narrow occasional table. The usually stand along a wall, or behind a couch to hold miscellaneous stuff, key bowls, candles, books, etc...

This one I did for the living room, and my wife is loath to part with it, though I will gladly replicate it should anybody want one.

I say replicate, because there isn't any way to make a copy. The top of this table is made up of three planks of red cedar that weathered outside for at least forty years. They were shelves in a plant stand my grandfather made for his green house. When the stand finally had enough, and fell over, I pulled it apart to see what I could do.

I took of at least an eighth of an inch of soft silver surface wood before I reached the inner heart that wasn't burned by UV. It has a deep reddish leathery color that only time brings.

I tied the planks together on the under side with wood straps instead of jointing them and gluing them up into a solid top. It looks more rustic.

The legs and apron are ripped down fir 2x4s from salvage. They are a tapering square, like a pencil post leg, but the inner sides tapper more sharply than the outside. It helps to make the table look more open.

Before I painted the legs and apron, I first ran a bit of barn red paint along the edges and corners. Then after I gave it a couple coats of black satin over that, I rubbed along the edges with steel wool to let the red just barely show. It's a bit too subtle to show in the photo, you don't even notice it unless you're looking for it.

The top got several coats of satin polyurethane, and that really brought out the deep color of the wood. I'm pretty happy with this one overall, I just have to find more old cedar now.

Saturday, February 7, 2009

The Pantry.

I just about bit off more than I could chew with this one. Part of the Perpetual Ongoing Remodel is the kitchen. We needed more storage for dry goods and cans, so I decided to build a free standing pantry, like a large armoire.
Large in this case ended up being eight foot six inches tall, by four feet wide, by twenty two inches deep. I couldn't stand it upright in the shop, and I had to call my brother over to help get it into the house.

I don't know what it weighs, but I don't want to move it again.

It has five adjustable shelves inside, and is open all the way across. Nearly everything in the kitchen fit inside it with room to spare. The stain is an early American, with a satin finish. All the door panels have several coats of chalkboard paint on them for doodles and lists. The knobs are oak with a few coats of black enamel.

As you see it in this picture, the pantry isn't completely finished. I plan on building a second short cabinet that will bolt to the side of it and cross the top of the refrigerator to attach to the wall. Then I will add crown moulding and a single top to both pieces.

This, like the picture panel bookcase, was entirely new wood. I would like to do a pantry or cupboard in salvaged wood, but the right pieces haven't come along yet. I'm patient though, they'll show up eventually.

Wednesday, February 4, 2009

Rough work.

This mirror frame was a fast and rough build that only took a couple hours. I had the mirror sitting around for a long time without a frame and I got tired of having to move it when it got in the way.
The frame was a single old yellow pine plank with one end broken and one end clean. I ripped it lengthwise on the table saw and then chopped it into nearly equal lengths on the miter saw.

I ran a quarter inch rabbet groove around the inside and brought it together with pocket screws and a little glue.
I gave the frame a scrubbing with steel wool to deepen the unevenness in the grain and then a coat of stain. No finish on this one, I wanted it to look flat, like old barn wood.

I have another, much larger mirror to frame yet, that one will be a much more careful project.
I'm thinking maybe something sort of Arts & Crafts, a Green brothers look maybe. We'll see.

Tuesday, February 3, 2009

Small Chest.

This is a little chest that's made completely from reclaimed wood. It's dimensions were dictated by the sizes of the pieces I had.
The front and back are yellow pine, and the sides are poplar, all from old closet shelves I tore out in the Perpetual Ongoing Remodel.
The top is a piece of white oak cut from a cast off table leaf I found in the garage of another house where I was refinishing the floors.

I smoothed the surfaces of all these pieces, but not completely. They had many years of scratches, dings, and abrasions that I like to leave in for character.


The joints in the corners are a very old lap type joint. The sides are cut back about a third of the way up from the floor the width of the fronts and back. You see this kind of join on viking sea chests and other ancient cased goods. It's strong and simple, kind of like one huge dove tail.

I glued and screwed the joints as well and covered the screw heads with maple buttons. I trimmed off the extra with my little Japanese pull saw, then sanded the buttons flush with the surface.
There isn't any stain on the chest, just a couple coats of satin polyurethane.
The poplar sides were already dark with age. Poplar gets a warm vanilla Carmel color with time and these already had dark green streaks from mineral deposition as the tree grew.

These were all single planks, not boards made up of joined pieces, the growth rings run all the way across the planks. Unless you go to a sawmill , and order what you need, you're not going to find that today.

We wasted most of the giant old growth forests of North America building things that no longer exist today. I think that if you're going to cut down a tree that has grown for 300 or 600 years, whatever you make out of it ought to be well built enough to last that long as well.

Monday, February 2, 2009

Bookcase with picture panel sides

I wanted to do a bookcase with more visual appeal than usual, but without adding frivolous scroll work or medallions or do-dads. I like raised panels sides in furniture to draw the eye, but I also like the idea of a thing reflecting or hinting at what it contains. At first, I was going to have prints of the covers of classic first edition books in all the panels, but, as it turns out, classic first editions generally have very boring covers.

You can't go wrong with pulp magazine covers though. They all have bright colors and vibrant illustration. You can stare at the sides of this bookcase and get sucked into the stories without even taking a book out.

All of these images are from large scans that I printed on heat transfers and ironed directly on the plywood inner walls of the case. This bookcase is really overbuilt, having both an inner cabinet carcass and an outer face frame. I always tend to use more material than is actually necessary. I like things that can take a lot of abuse, and it's mass that survives the ravages of time, not engineering.


This bookcase has fixed shelves in it, but the next one will be adjustable. I need the proper jig to drill the holes for the shelf clips. If they aren't even on both sides, the shelves will slant.

Most of the material in this, I bought new. The idea of what I wanted just didn't fit with any of the wood I had on hand. The baseboard is a salvaged 2x6 though.

The paint is two coats of black satin over a flat white base coat. Then it got two coats of satin polyurethane.


Here is a close up on one of the panels. The moisture content of the wood has to be considered when you use heat transfers. Old dry wood will take it flat and evenly, but, if there is more water present in the wood, it will steam up and change the texture of the print. This isn't necessarily a bad thing , partial melting and cooling of the transfer gives it a look like heavily brushed oil paint. That looks better with subject matter like Treasure Island than Science Fiction Quarterly.

I really like how this experiment came out, and I plan to use the same technique in other pieces. The only limit I'm running into is the size of the image I can print at home. I think I'll be happy to play around with what I can do for a while before I start looking for a larger printer though.


Sunday, February 1, 2009

Wine Crate end tables.

My wife brought me home some used wine crates once, and I kicked them around a while until I decided what to use them for. The crates vary in size and construction depending on who's wine they held originally. Some just have nailed corners, and others have finger joints. They often have terrible sticky tags pasted on them that take a lot of scraping to remove.

The Winery names are some times burned into the wood with a hot iron, and some are printed on. I give them a lite sanding to smooth out the surface a bit and remove splinters, but I'm careful not to take off the ink. The names and logos are half the appeal of repurposing stuff like this.

The one at the top of the post is an early one. It's legs and trestle bar were some old poplar shelves from a closet I ripped out of the house, the top was new pine. I just did a simple trefoil cut out in the feet for decoration. Medieval looks are always my first inclination.

The fleur de lis cutouts came out nicely, but they were a big pain in the neck. I probably won't do them again unless I'm feeling real patient, or somebody wants to buy one.

The tops come off all of these so you can use the crate for storage. I put a rim of wood around the bottom of the lid so that it stays put unless you lift it off. I think I'll put hinges on one in the future to see how that goes. I think it may require reinforcing the crate wall on some of them, they are often less than a quarter inch thick.

The crates also often have knots in them, so I don't shy away from using similarly knotted wood for the tops and legs. After stain and several coats of a nice satin finish, it all blends together nicely.


This pair is actually a set I sold to a lady who gave them as gifts. Wine people really like this stuff. It tends to come out with a sort of naive, rustic feel to it. I think that's one of my own preferences in furniture design as well. Honesty and simplicity in form and function, no unneeded flourishes.