Sunday, March 8, 2009

A new set of Wine Crate End Tables.

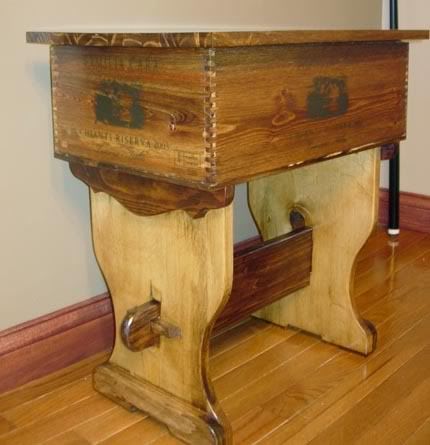
I just finished a new set of the wine crate tables and I'm pretty pleased with them. Again, I tried some new design ideas, and though I probably won't repeat them in exactly the same way the next time, I did learn some things.
These crates are from Familia Cara, they have an image of a nice Italian family dressed in clothes of around 1890 on the sides. It's an ink print instead of burned on, but it's mostly clear and looks nice. The crates have good finger joint corners, which always add visual interest and plenty of strength.
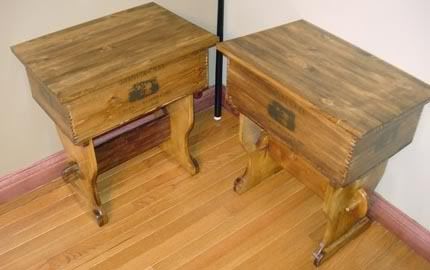

I've decided to start assigning stock numbers to each of the tables I build. No two of them is exactly the same as any other, and it will help to be certain about which piece we're talking about when I have to answer questions. So, above on the left is WCET10, and on the right is WCET11. That's straightforward enough.
The main differance between these two is that WCET10 has a narrower trestle bar than WCET11, and WCET11 uses rounded dowel pins through the tenons, while WCET10 has square ones. They are that way, because that's how the materials I had on hand were.
I don't have a pattern for the parts, I just freehand all the cuts. I have to say, though, that I'm thinking of making patterns of some of my favorite curves and shapes. Just to make things go faster when I'm not breaking new ground in my plans.
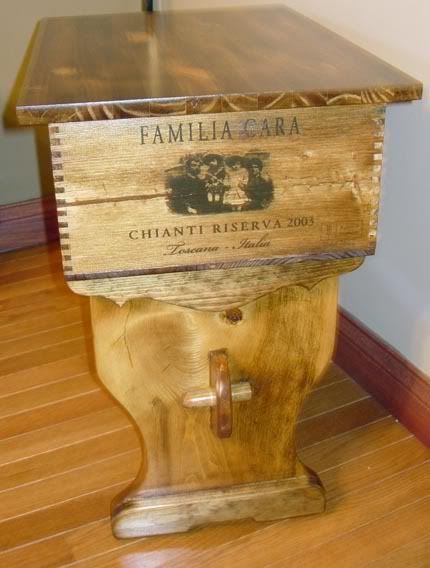


I really got lucky with finding the wood for the legs on these two tables. It's pine, and while it's new lumber, It's from a very large, old tree. The growth rings in the wood are very closely spaced, and very curly. Nothing like the run of the mill you usually find in a place like Menard's, which is where I got it. I spent half an hour rooting through the low quality planks and found it in the bottom of the pile. I suppose it was in there because it had a wainy spot on one side. That sort of thing is no disqualifier for me though, It just adds character to my way of thinking.
I restack all the planks I've gone through when I'm done, I've worked retail before and inconsiderate customers just add to the trials of that sort of work.
It did have a great deal of sap in it though, and I knew that would be a problem for the sanding and finishing, and it was. This much resin in the wood smells great, but once it heats up from sanding, it gums up paper faster than you can replace it. To get rid of as much of the resin on the surface as I could, I first rubbed the wood with acetone and scrapped it. It helped some, but the sanding still used up a lot of paper.
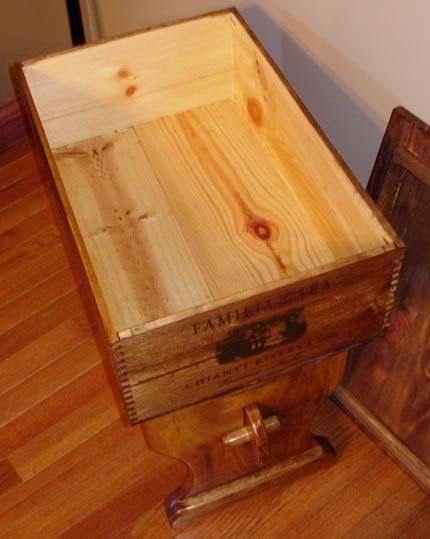
Here's a shot with the top off to show the inside of the table. I didn't stain the inside of the crates, but they did get a coat of satin polyurethane. The stain used on the outside is minwax provincial, a nice medium color. There are three coats of satin poly on the outside.
Instead of having cutouts for the feet, this time I added a second piece of wood to give it some extra weight and stability. I think with the next crate tables I will combine the two and have some sort of heavy foot and decorative cutouts.
I think the crate table design is evolving toward a "best combination of features" design. It will be something strong, comfortable in appearance, and with practical uses.
I will be very interested to see what it looks like.
I'm going to put this pair up on ebay to see what I can get for them. I'm also considering etsy, since it seems to be dedicated to handmade things only.

Monday, March 2, 2009

The Pallet Shelf.


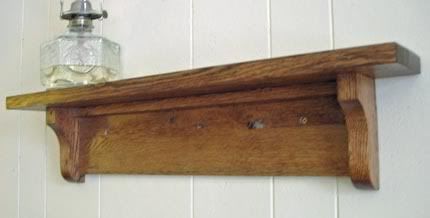
This is a simple little wall shelf. It has somewhat mission-like lines, square edges, simple corbels, a solid back. The only thing that's different about it is that it's made entirely of red oak from a shipping pallet. I think the pallet was from a shipment of auto parts dad ordered, or maybe his heat pump.
Anyway, lots of pallets are made of low grade red oak. It's durable, and the pallet can be in use for quite a while. Eventually though, they crack, or come apart and get thrown away. I don't know if anyone recycles pallets. They're put together with spiral nails shot by air guns and those are very difficult to get out. Especially with oak, it's tenacious about holding on to nails, once they've been driven in.
You would have to have equipment that could handle cutting through lots of metal, and then you'd probably only be able to make mulch with the remains. Unless you were willing to spend the time prying or cutting a pallet apart by hand for the salvageable parts, like me.
I can't help but at least try to do things the hard way. I'm not right.
After some planeing and sanding, the parts for the shelf looked quite nice. You never know what's hidden under the dirt and grit on an old piece of oak. Most of the pallet just wasn't salvageable, too many splits and knots, but enough was solid for a small project. The rest of it fed the wood stove in the shop.
You never know though, when a piece of material that looks usable only for heating, may have a hidden beauty underneath the grime. Here's to diamonds in the rough.

Tuesday, February 24, 2009

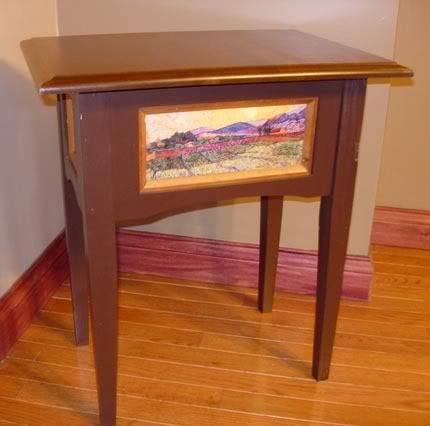
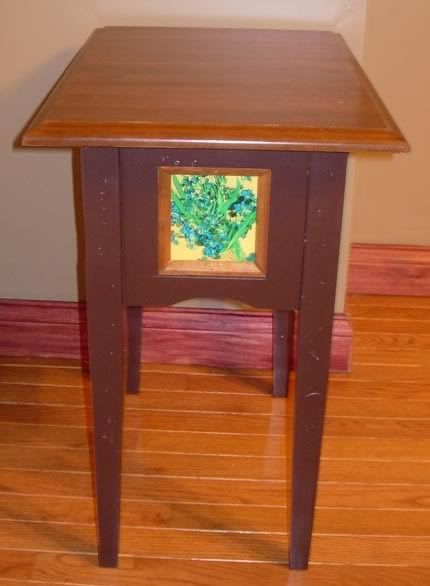
The Van Gogh end table

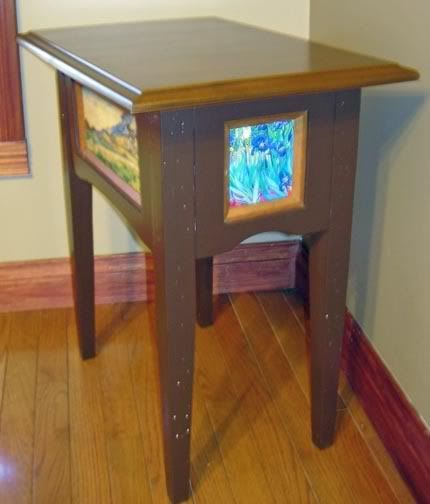
This is a little end table that was fun to build, or at least interesting, which is the same thing to me. I learned a few things that will be applied to future builds and I think I'd like to use this same general idea on a lot of other projects. A library table comes to mind. Maybe one with scenes from famous books inset in the apron wrapping around the underside.

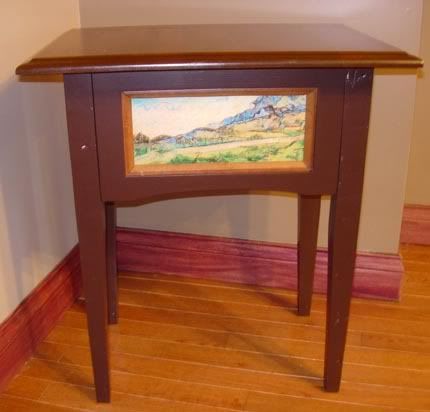
The top of this table is actually a sample raised panel that my mom picked up at a yard sale. It's beech, a tight grained wood that is often used as a substitute for cherry.
The picture frame aprons are pine, just stock 1x2 material. I picked it out for it's straight grain and clean look. The images themselves are all paintings by Van Gogh, clipped to size in photoshop, and printed on heat transfer sheets. The sheets are then ironed on to 1/4 inch plywood backs that are inset in the backs of the frame aprons like a picture would be. I ran a chamfered edge moulding around the inside of the frames and stained it to bring out a contrast with the paintings. I had to make the moulding since I didn't have anything on hand that would fit, that was tedious.

The legs are pencil posts with a sharper inner angle. They are again reclaimed fir 2x4s with many nail holes and chips. The top is stained, but I painted the legs and aprons with a dark brown called "expresso". It's a great color, but I won't use that company's paint again because it was a terrible pain to get spread on evenly. It took four coats before I was satisfied.
The legs bolt on and come off easily. This time I used wing nuts, so no wrench is needed.


I've come to really like Van Gogh. I didn't care for expressionism when I was younger. Everything is expressionist in the morning before you find your glasses, and I couldn't see what was all that great about that. I have nice scans of some of his lesser known works now, and I'd like to use them in something. I just don't know if my wife will like the skeleton smoking a cigarette, or the earless self portrait.


Saturday, February 21, 2009

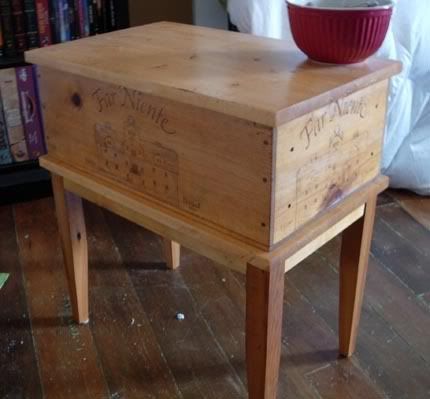
Wine crate end table with legs.

This is the first wine crate end table that I built. I did this one with four tapered pencil post legs before I decided the renaissance trestle style worked better for the wine crates.
The legs are reclaimed fir, sawed down from old 2x4s with nail holes and oxidation stains left in, I like them better that way.
The stain is very light, Minwax Ipswitch pine. It hardly darkened the wood at all. I tend to like darker stains, but I thought I'd give this one a try. The table was meant for a room with a dark wood floor and brown walls and I figured a light colored piece of furniture would help brighten the room.

The legs on this table bolt on and are removable. The pieces of the apron are screwed and glued to the plate that the crate sits on. a corner brace connects with each part of the apron and a threaded bolt pulls the leg tightly into a triangle formed from the aprons and the brace.

I learned this design for attaching legs when I was working for an Amish furniture dealer. The Amish used this design on all the leg tables they made, from end tables to twenty seat dining tables and I think it's the strongest leg joint you can have. A little piece like the wine crate end only needs a single bolt in the corner, but bigger legs use two or three.

As the table ages, or due to temperature and humidity variations, the wood may shrink or expand, but this joint requires only a quarter turn on the nuts to keep it snugged up tight.

The top comes off to access the crate for storage, and this one is currently full of photo albums, you know, physical pictures, from before we let them pile up on the hard drive unseen.

Friday, February 13, 2009

My dog wants a bite of your sandwich.

Give the Pupster some sandwich, and a chip, he likes chips.

Monday, February 9, 2009

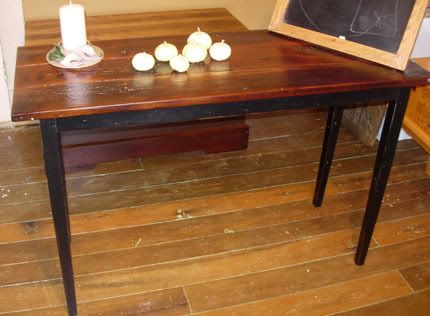
Sofa Table.

A sofa table or hall table is what you call any tall narrow occasional table. The usually stand along a wall, or behind a couch to hold miscellaneous stuff, key bowls, candles, books, etc...

This one I did for the living room, and my wife is loath to part with it, though I will gladly replicate it should anybody want one.

I say replicate, because there isn't any way to make a copy. The top of this table is made up of three planks of red cedar that weathered outside for at least forty years. They were shelves in a plant stand my grandfather made for his green house. When the stand finally had enough, and fell over, I pulled it apart to see what I could do.

I took of at least an eighth of an inch of soft silver surface wood before I reached the inner heart that wasn't burned by UV. It has a deep reddish leathery color that only time brings.

I tied the planks together on the under side with wood straps instead of jointing them and gluing them up into a solid top. It looks more rustic.

The legs and apron are ripped down fir 2x4s from salvage. They are a tapering square, like a pencil post leg, but the inner sides tapper more sharply than the outside. It helps to make the table look more open.

Before I painted the legs and apron, I first ran a bit of barn red paint along the edges and corners. Then after I gave it a couple coats of black satin over that, I rubbed along the edges with steel wool to let the red just barely show. It's a bit too subtle to show in the photo, you don't even notice it unless you're looking for it.

The top got several coats of satin polyurethane, and that really brought out the deep color of the wood. I'm pretty happy with this one overall, I just have to find more old cedar now.

Saturday, February 7, 2009

The Pantry.

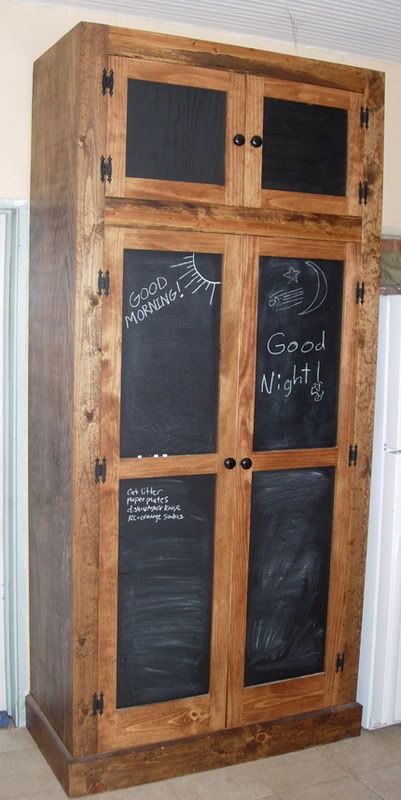
I just about bit off more than I could chew with this one. Part of the Perpetual Ongoing Remodel is the kitchen. We needed more storage for dry goods and cans, so I decided to build a free standing pantry, like a large armoire.
Large in this case ended up being eight foot six inches tall, by four feet wide, by twenty two inches deep. I couldn't stand it upright in the shop, and I had to call my brother over to help get it into the house.

I don't know what it weighs, but I don't want to move it again.

It has five adjustable shelves inside, and is open all the way across. Nearly everything in the kitchen fit inside it with room to spare. The stain is an early American, with a satin finish. All the door panels have several coats of chalkboard paint on them for doodles and lists. The knobs are oak with a few coats of black enamel.

As you see it in this picture, the pantry isn't completely finished. I plan on building a second short cabinet that will bolt to the side of it and cross the top of the refrigerator to attach to the wall. Then I will add crown moulding and a single top to both pieces.

This, like the picture panel bookcase, was entirely new wood. I would like to do a pantry or cupboard in salvaged wood, but the right pieces haven't come along yet. I'm patient though, they'll show up eventually.